GitHub Pages
Hosting your Retype built website on GitHub Pages is free and simple to setup.
Step 1: Add retype-action.yml workflow
We first recommend adding the Retype Build Action to your project to automate the building and deployment of your Retype powered website.
Community Key
Read about the free Community key if hosting on GitHub Pages and unlock Pro features for your project.
Step 2: Configure GitHub Pages
With some simple configuration, GitHub can host your website for free.
To get started, navigate to the Settings > Pages page of your repo. The URL should be the following, although you will need to replace <organization> and <repo> with your values:
https://github.com/<organization>/<repo>/settings/pagesPick a branch
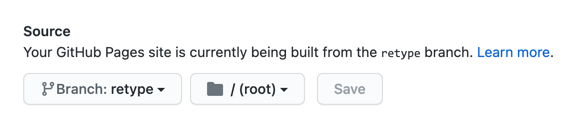
By default, the Retype Action will publish your website to a retype branch, although you can configure to host from any branch.
If you have committed the retype-action.yml file as detailed in retype branch available within the list. Select retype then click the Save button.
Your GitHub Pages configuration should now look similar to the following:
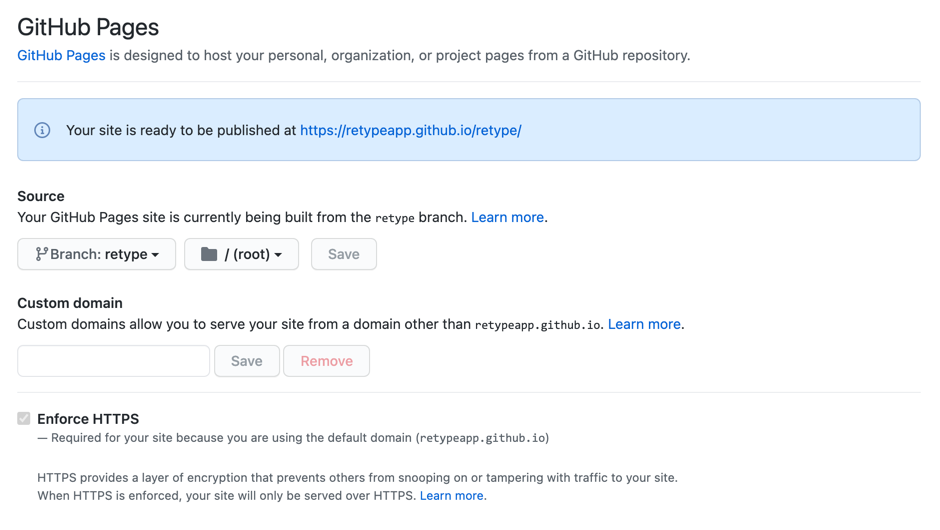
Enforce HTTPS
We recommend that you check the Enforce HTTPS checkbox.
Set a url
With the above sample, GitHub will provide a unique github.io subdomain to host your website from.
Your website will be available from a subfolder of that subdomain. In our scenario, our website will be available in the /retype/ subfolder.
For example, the URL will use the following pattern:
https://<organization>.github.io/<repo>/You would then set the url configuration with the following, where <organization> is replaced with your GitHub organization name and <repo> is replaced with your repository name.
url: <organization>.github.io/<repo>/If your GitHub organization name was CompanyX and your repo name was Docs, your url configuration would be:
url: companyx.github.io/docs/Custom domain
Instead of using the github.io domain, it is possible to configure GitHub Pages to use a custom domain name or subdomain name.
Just enter your domain name or subdomain name in the Custom domain field and click Save.
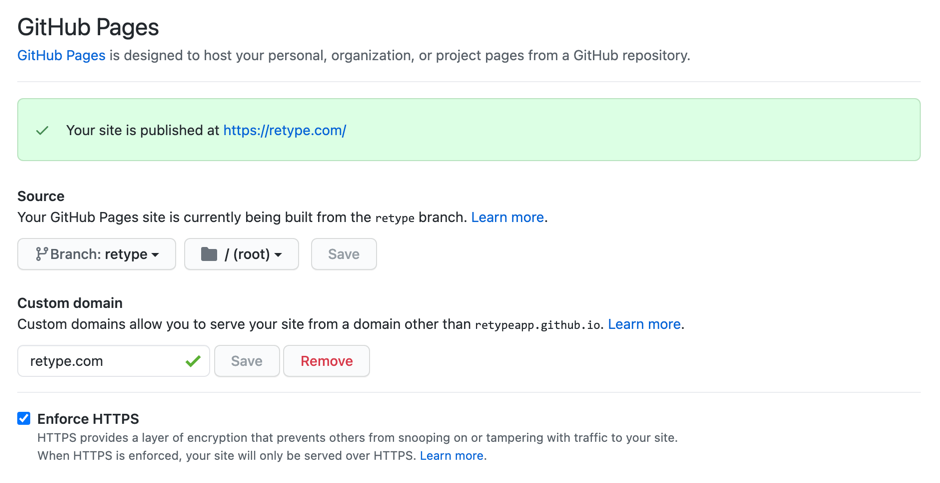
If your website will be available at https://example.com, use example.com as the Custom domain value.
If your website will be available at https://docs.example.com, use docs.example.com.
You will then need to configure the DNS for your domain name.
The last step would be updating the url project configuration with the same value. For example, if your website will be available at https://example.com, use the following url configuration:
url: example.com